In this tutorial we'll be building our own REST API with endpoints that will handle CRUD operations. For those not familiar with CRUD operations, it might be easier to break it down like this:
When performing these operations, we use 4 different request types. These request types are POST, GET, PUT and DELETE. So CRUD stands for:
Create (Saving data to databases using POST requests)
Read (Reading data from databases using GET requests)
Update (Updating data in databases using PUT requests)
Delete (Deleting data in databases using DELETE requests)
Prerequisites
Project Structure
Installing dependencies
In the root of our project we will want to start off by initializing NPM so that we can manage our dependencies. We can pass the -y flag to set all the package.json data to defaults and save some time (time is money).
Terminal
npm init -yNow we can start installing the required dependencies. Let's start with Express, which is a minimalist framework for building web applications.
Terminal
npm install express --saveNext we will install Nodemon which is a utility tool that will automatically restart our server as we make changes to the code so that we don't have to initialize our server for every single little change that we make.
Terminal
npm install nodemon --save-devNow that we have nodemon installed as a local dependency of our project, we will have to create a NPM script to start the development server. So let's add a start script in our package.json (which was created when we previously initialized NPM).
package.json
1{
2  "name": "node_express_mockdb_tutorial",
3  "version": "1.0.0",
4  "description": "",
5  "main": "index.js",
6  "scripts": {
7    "start": "nodemon index.js"
8  },
9  "keywords": [],
10  "author": "Christopher Af Bjur",
11  "license": "ISC",
12  "dependencies": {
13    "express": "^4.17.1"
14  },
15  "devDependencies": {
16    "nodemon": "^2.0.4"
17  }
18}
19
Initializing Express
Now it's time to do what we do best. Code! Let's start by modifying index.js (create it in the project root if you haven't already).
index.js
const express = require("express");
const app = express();
const port = 3000;

app.listen(port, () => console.log(`Running server on port ${port}`));We start by requiring the Express dependency that we previously installed with npm. We store it in the variable express.
We then create an express app instance and store it in a variable that we call app.
Let's also define a port variable which we will pass as the first argument of the app.listen method which actually starts our express server at that port. As a second argument we'll pass a callback function which will print a message as soon as the server is successfully running.
That was easy, wasn't it? Let's break the ice and start the server to see if it works.
Remember that package.json start script that we defined earlier? It's time to make use of it!
Terminal
npm run startYou should now be able to see that nodemon starts and that the console.log callback that we defined is telling us that the server started. Great!
Setting up a "Fake Database"
To keep the first part of these tutorial series simple, we'll not connect our REST API to any database in this part. We will learn how to connect it both to a MySQL database and a PostgreSQL database as a next step. But for now, instead we will simulate a small database that will store message data in a fake database table. We can do this by defining a messages array, which will simulate the table. In this array we'll define some initial objects that contain an id and a message text. These objects can be thought of as database rows of the table, where every key/value pair can be thought of as a database column.
So create a new file messagesTable.js in the root and export it so that we can require it in our index.js file later on.
messagesTable.js
module.exports = [
  { id: 1, text: "Message #1" },
  { id: 2, text: "Message #2" },
  { id: 3, text: "Message #3" },
];
Then let's require messageTable.js in our index.js file. Let's store it in a constant and name it MESSAGES with capital letters to make it more readable and clear to ourselves that this is the fake database table. So by now your index.js should look like this.
index.js
1const express = require("express");
2const MESSAGES = require("./messagesTable");
3const app = express();
4const port = 3000;
5
6app.listen(port, () => console.log(`Running server on port ${port}`));
Adding middleware
There are various types of data formats that we could use when passing data around in a REST API but in this tutorial we'll work with JSON data while making our requests. From my own experience it's quite easy and beneficial to work with JSON data when creating Javascript apps. Other languages as well, when I think of it. So yeah! JSON it is!
In order to be able to parse the data sent, meaning converting the data sent into a format that both the client and the server understands, we will use a middleware function that converts the data payload for all requests being sent.
For those that aren't familiar with middleware functions, they are basically a function that we can apply to our servers, that will run everytime a request is being made to our (not yet built) endpoints (functions that handle the data of the requests). So the responsibility for this middleware function will only be to convert the data to JSON, before it gets sent further to the next function which will be our request handlers where we handle the data passed in the requests. We're going to create these request handlers later on.
Ok, enough of the technical talk. Express has a built in middleware function for doing everything that I described - so we will use it in our app before starting the app, like so:
index.js
1const express = require("express");
2const MESSAGES = require("./messagesTable");
3const app = express();
4const port = 3000;
5
6app.use(express.json());
7
8app.listen(port, () => console.log(`Running server on port ${port}`));
Handling POST requests
Now the time has come to create the functionality for handling POST requests. This goes at the bottom of our index.js file, but just above our app.listen method call. For all the upcoming functionality, I will show you a code snippet that you can copy/paste and below it I will explain exactly what's going on. Sound good? Ok let's go.
index.js
app.post("/", function (req, res) {
  const message = { id: MESSAGES.length + 1, text: req.body.text };
  MESSAGES.push(message);
  res.status(200).send(message);
});So first we'll call the app.post method. This function takes two arguments.
The first argument is the route, which we'll define as a forward slash. This means that when running our server, we'll handle requests that's being sent towards the endpoint http://127.0.0.1:3000/. If we want we could change the route for this endpoint to, for instance, "/addMessage". This change would in turn affect the API so that we would have to send POST requests to http://127.0.0.1:3000/addMessage in order to handle the request. Anyhow, for now, we'll just go with forward-slash to keep things simple.
The second argument is the callback function. This is the function that will be called as soon as a POST request is being sent to this route. This callback function has 2 parameters req and res. Where the first one req (request) is an object which will contain a bunch of data that's being passed at the time of requesting this endpoint. We can use req.body to access the custom data which we'll later send within the POST request. In the request body we'll later define a text key/value pair, which we'll later read in our function.
In our callback function we'll create a message object that consists of 2 key/value pairs; id and text. We then push this message object to our fake database table MESSAGES. Note that for the id we use the length of the current MESSAGES array and apply 1 to it, to simulate auto incrementing id's which are used in for instance relational databases such as MySQL or PostgreSQL.
We wrap up the function by using the res (response) object which is going to be sent back to the client. Here we prepare a status of 200 which is a status code that will be read by the client. It basically means: "You sent a request and got back some data, so the operation was successful". You can read more about what different types of status codes means here.
Lastly we send back a response to the client with our newly (saved to fake database) created message. This doesn't have to be the message object it self, it might be a string like "ok" or whatever. But it's beneficial for the request sender to be able to read the id data etc in case they wan't to run further operations based on that id.
Handling GET requests
Now that you know more about POST requests, we're going to create similar functionality but for handling the GET requests. Here we will want to define functionality for handling two types of GET requests.
Getting ALL the messages.
Getting a specific message based on its id
So right below the POST request handler that we just created, we will create the first GET request handler which will trigger when we want to get all the messages in our database table messages.
index.js
app.get("/", function (req, res) {
  res.status(200).send(MESSAGES);
});
As you can see this one is super simple. All we do is call the app.get method and send back the whole MESSAGES array as a response with a status code of 200 which you should already be familiar with this far.
Next we'll create our second endpoint, right below the previous one, for getting a specific message based on an id. In order to be able to do this we need to tell this endpoint that it's going to require a request parameter which is going to be called id. This can be done by appending a colon followed by the parameter, which we choose to call id.
Now, this means that when someone makes a GET requests towards http://127.0.0.1:3000/ they will get all the messages from our previously defined endpoint. But if they instead make a GET request towards http://127.0.0.1:3000/1337, that means that they will reach the endpoint that takes an id parameter. So when passing 1337 as a request parameter, that value will become available in the req.params.id object property. Note that the last part of the reference (id) is the same as the string defined after the colon in the first argument of the app.get method, meaning that if you use any other parameter, that chosen name should be used in both places.
index.js
app.get("/:id", function (req, res) {
  const id = parseInt(req.params.id);
  const found = MESSAGES.filter((message) => message.id === id);

  if (found.length > 0) {
    res.status(200).send(found);
  } else {
    res.status(404).send({ msg: `No message with id ${id} found!` });
  }
});So, in our callback function we create an id variable which stores the value of the returned value of parseInt which takes the req.params.id. This has to be done as the parameter passed in the req.params object, is going to be a string. Since we're defining ids as numbers, we need to parse the string to a number.
We then use this id variable to filter the MESSAGES array, looking for a message.id that matches with the id stored in our id variable. We store the result of this operation in a variable called found.
If the found result, which will always be an array, is more than 0 we append a success status code and send the found messages back as a response.
If, however, no messages where found based on the requested id, we return a statuscode 404 which basically means "What you requested was not found" and then send back an object with a msg property that contains an error message in the form of a template string which states which id was not found.
Handling PUT requests
Next we'll create an endpoint which will handle PUT requests. These types of requests are used for updating data. So for this endpoint we will need two things in order to update a message.
The id of the message to update.
The data that should be updated.
index.js
app.put("/:id", function (req, res) {
  const id = parseInt(req.params.id);
  const found = MESSAGES.find((message) => message.id === id);
  const updated = [];

  if (found) {
    MESSAGES.forEach((message) => {
      if (message.id === found.id) {
        message.text = req.body.text || message.text;
        updated.push(message);
      }
    });
    res.status(200).send(updated);
  } else {
    res.status(404).send({ msg: `No message with id ${id} found!` });
  }
});We start by calling the app.put method which will use a request parameter to get the id as well as the request body (req.body) which will contain the update data. So similar to one of our GET requests, in the callback function (2nd argument of app.put method) we parse the id and store it in a variable.
We then use the array method find on our MESSAGES array to find a message with the specified id, we store the result in a variable found. So the value will be either a message object or undefined.
We define a updated variable which is an empty array that we will soon push found messages to - in order to be able to return the found data in the response.
Next we check to see if a message object was found. If it was, we loop through the MESSAGES array using the array method forEach. If the current message.id matches with the found.id, we set the text property of the current message to req.body.text or fallback to the message's current text (in case the text data is never sent when the request is being made). We then push this updated message to the updated array so that we can send the updated data back as a response. We do this by defining a response statuscode of 200 and sending the updated data in the response.
If no message was matching the requested id, we send an object with a msg property containing the error message, with a statuscode of 404, as a response.
Handling DELETE requests
Now, the last endpoint of this tutorial, which will handle the DELETE requests.
index.js
app.delete("/:id", function (req, res) {
  const id = parseInt(req.params.id);
  const found = MESSAGES.find((message) => message.id === id);
  const deleted = [];
  let removeIndex = null;

  if (found) {
    removeIndex = MESSAGES.indexOf(found);
    MESSAGES.splice(removeIndex, 1);
    deleted.push({ id: found.id });
    res.status(200).send(deleted);
  } else {
    res.status(404).send({ msg: `No message with id ${id} found!` });
  }
});You might notice that this enpoint looks somewhat similar to our PUT request endpoint. At least the id and found variable parts.
After these variable declarations we'll need 2 other variables removeIndex and deleted.
We declare removeIndex using the let keyword its value will change if we find a matching message.
The deleted variable will be declared as a const since this will always be an array. We'll later push the deleted item to this array before we return it in the response.
So, if we find a message.id that corresponds to the requested id, we use the array method indexOf to get the found messages' index of our MESSAGES array and store the result in the removeIndex variable.
We then use the array method splice to remove the found message from the MESSAGES array by passing the removeIndex as well as 1 (meaning we remove this index only and no more indexes).
Now that we've removed the message from the MESSAGES array, we push a new object, that holds the deleted item's id, to the deleted array.
Next we set the statuscode to 200 and send the deleted messages array as a response.
If no message was found with the requested id, we return a 404 with an object containing a msg property with the error message.
Testing the endpoints using cURL
If you have curl installed on your computer you can follow along in this section. Note that all Mac computers, with operating system version equal to or greater than OSX, comes with cURL pre-installed.
Obviously your Express server needs to be running before you try to make any requests to it. So if it's not already running, start it.
Terminal
npm run startExecuting a POST request
Next we'll make a POST request from a terminal. We'll send the request to http://127.0.0.1:3000 which is equal to localhost, at port 3000 which is the port that we use for our application. We pass a JSON request body with the message text. We also pass a request header that defines that the data that we're sending is JSON data.
Terminal
curl -X POST http://127.0.0.1:3000/ -d '{"text":"New message"}' -H "Content-Type: application/json"When sending this request from your terminal, you should get a response back that looks like this:
Terminal Response
{"id":4,"text":"New message"}Cool! So now we've successfully created a new message with a POST request!
Executing GET requests
Now let's try to make a GET request, fetching all the messages that our server has stored so far. We should be able to fetch the 3 initial messages + the new one that we added with the POST request.
Note
Since we're storing our message data directly in our server the created/updated/deleted data will only exist untill the server restarts - since the MESSAGES array will be re-declared with the initial values. This means that if you restarted the server manually or if it auto restarted with nodemon, after you made the POST request, you will not see that created data when you make the GET request - only the initial messages.
So let's test our GET endpoint which will return all the messages stored in the MESSAGES array so far.
Terminal
curl -X GET http://127.0.0.1:3000/Boom! Here's all of our messages.
Terminal Response
[{"id":1,"text":"Message #1"},{"id":2,"text":"Message #2"},{"id":3,"text":"Message #3"},{"id":4,"text":"New message"}]Next, let's try the GET endpoint which will return a specific message based on the passed request parameter id.
So, this time, let's pass a request parameter 2 when making the GET request.
Terminal
curl -X GET http://127.0.0.1:3000/2Voila! We get the message with the requested id.
Terminal Response
[{"id":2,"text":"Message #2"}]But what if we request an id that doesn't exist in our MESSAGES array? Let's see.
Terminal
curl -X GET http://127.0.0.1:3000/1337Ah! We get back the error object that we previously defined - telling us that the message with id 1337 was not found. Perfect!
Terminal Response
{"msg":"No message with id 1337 found!"}Executing a PUT request
Now let's try updating a message. Let's update message with id 2.
Terminal
curl -X PUT http://127.0.0.1:3000/2 -d '{"text":"Updated message"}' -H "Content-Type: application/json"We get back our updated message as a response. Awesome!
Terminal Response
[{"id":2,"text":"Updated message"}]Executing a DELETE request
Finally, let's try to delete a message. Let's delete message with id 1.
Terminal
curl -X DELETE http://127.0.0.1:3000/1Works like a charm!
Terminal Response
[{"id":1}]The Final Test
Now if you didn't restart the server, while making all of these requests, you can confirm that message data has been created/updated/deleted by making a final GET request for getting all the messages.
Terminal
curl -X GET http://127.0.0.1:3000/Charming. Isn't it?
Terminal Response
[{"id":2,"text":"Updated message"},{"id":3,"text":"Message #3"},{"id":4,"text":"New message"}]Testing the endpoints using Postman
So if you were unable to test your endpoints with cURL, or just didn't feel like doing so, the time has come to test our endpoints using Postman.
Let's start off by making sure that our Express server is running. As you already know, we run it by executing the following command from our project root.
Terminal
npm run startExecuting a POST request
So, open up Postman and from the top menu, select File > New Tab.
Then select POST from the dropdown menu and input http://127.0.0.1:3000/ as the request url. Note that this is the same as inputting http://localhost:3000/ so choose whatever you prefer.
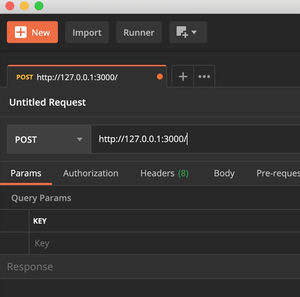
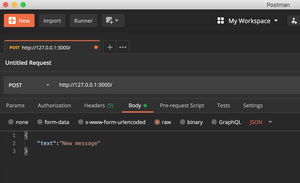
Next click on Body just below the request url bar.
Select raw in the radio button selection and in the dropdown to the right of the radio buttons, select JSON. Then press the Send button.
Now in the bottom section of Postman, you should see a response consisting of the message that we just created, as well as a Status of "200 OK".
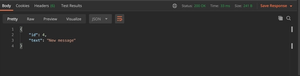
Awesome! We've just created our first message by sending our first POST request.
Executing GET requests
Now let's try to make a GET request, fetching all the messages that our server has stored so far. We should be able to fetch the 3 initial messages + the new one that we added with the POST request.
Note
Since we're storing our message data directly in our server the created/updated/deleted data will only exist untill the server restarts - since the MESSAGES array will be re-declared with the initial values. This means that if you restarted the server manually or if it auto restarted with nodemon, after you made the POST request, you will not see that created data when you make the GET request - only the initial messages.
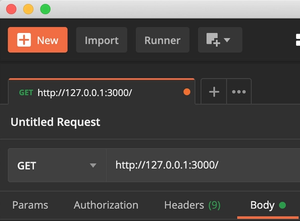
So let's test our GET endpoint which will return all the messages stored in the MESSAGES array so far. We can do this by simply just changing the request type to GET from the top left drop-down menu. Note that we can leave the request body data as is - it will not be sent with the GET request anyways. Press Send when you've applied that change to the request type.
Now we should get some data back which we can find in the response body section of Postman.
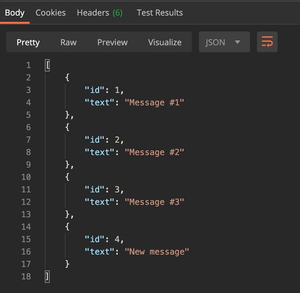
Cool! So we were able to get all the messages. Now let's test our other GET endpoint which will return a specific message based on the request parameter passed with the request.
Simply add an id to the request URL. Let's get message with id 2. Then press Send again.
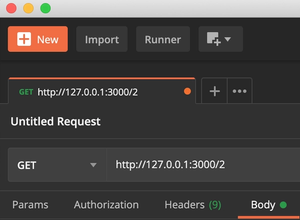
This time the response body should look like so:

Doesn't it just feel good when you get whatever you request? Love it.
Ok, so what happens if we try to request a message with an id that doesn't exist? Let's try it out. Let's use 1337 as an id.
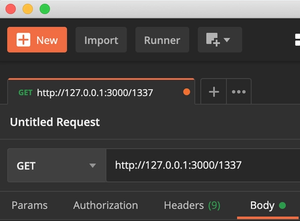
Press Send and see what happens.
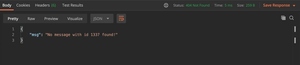
Wonderful! We're getting our error message that we defined earlier, with the statuscode of 404 which means that the item that we requested was not found on the server.
Executing a PUT request
Now let's try updating a message. Let's update message with id 2.
So first, change the request type to PUT and make sure that the request parameter is 2 in the request url.
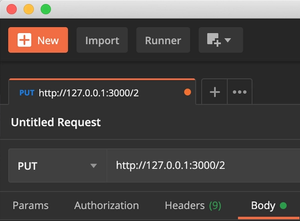
Then before sending this, let's modify the request body.
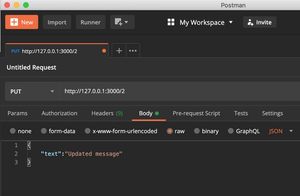
Now press Send.
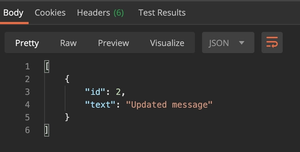
And the response body should now return our updated message.
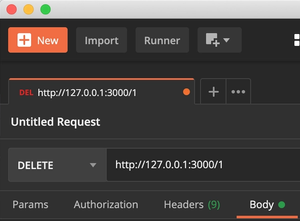
Executing a DELETE request
Finally, let's try to delete a message. Let's delete message with id 1. So change the request type to DELETE and make sure that you pass the id 1 as a request parameter.
We get the deleted message back as a response within the response body.
The Final Test
Now if you didn't restart the server, while making all of these requests, you can confirm that message data has been created/updated/deleted by making a final GET request for getting all the messages.

After pressing Send, we get the following response body.

Final words
You're now one step closer to being able to construct a fully functional REST api using Node.js and Express. In the next tutorial of these series, we will take the API that we just built to the next level and connect it to a real database!
You can find the final source code for this tutorial here.