This is a short tutorial on how to setup a PostgreSQL environment on your computer.
Installation
We'll start off by downloading and installing the PostgreSQL Server. Since this tutorial focuses mainly on MacOS for now, that's what I will explain here. If you're using another OS such as Windows - head back later and I might've updated this tutorial.
So let's get started.
Go to this page and select which version that you want to download and then download the DMG archive. In this tutorial we'll be using version 12.4 so grab that one if you want to be 100% sure that there aren't any breaking changes that will mess something up down the road of this tutorial.
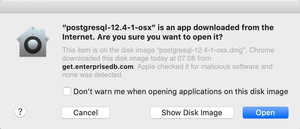
Once the download has finished, click the DMG archive then click the installer.
Click Open if you see this dialog.
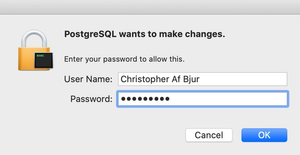
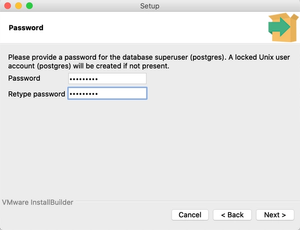
If prompted to input your password, do so:
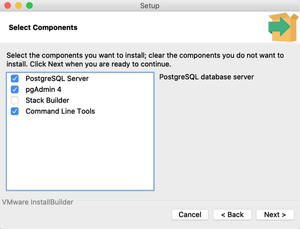
When the installer opens, follow through untill you see the following window and uncheck Stack Builder before clicking Next.
Follow through untill you see the following window and select a secure password for the database user. It's important that you memorize this password or save it somewhere safe.
Click Next
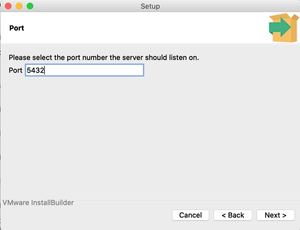
Next, select a port that our PostgreSQL server should listen to. Go with the default 5432 port if you can.
Click Next
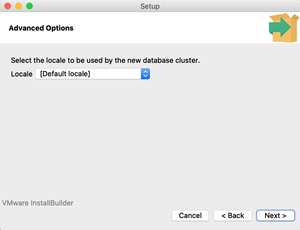
Select the Default Locale
Click Next
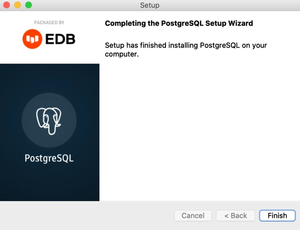
Click Finish
Setting up PgAdmin 4
So in order to be able to manage our databases with simplicity, we'll need a graphical tool for that. We'll use pgAdmin 4 which was installed during the PostgreSQL installation process.
Press CMD + SPACE and type pgadmin and click the suggested application. The browser will open up. Note that if the browser does not open up, click on the elephant icon in the top menu bar of your screen and click new pgAdmin 4 window....
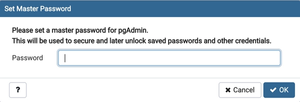
When in pgAdmin we'll get prompted to select a master password. Select a secure password and click OK.
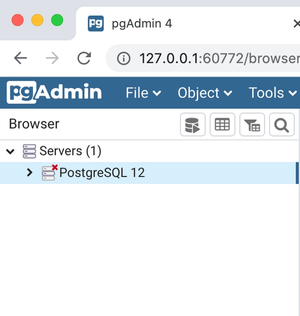
In the left menu, click to expand Servers and click PostgreSQL 12. Note that you might have a different version than 12 if you're reading this from the future.
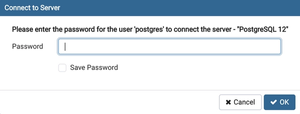
You will now be prompted to input the database user password that we setup earlier when installing PostgreSQL.
Input the database user password it and click OK.
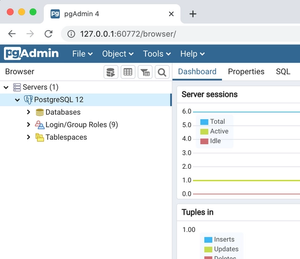
Woohoo! You are now logged in to your local PostgreSQL database!
Creating a user
Next we'll setup a user. This is good to know since we might want to create users with varying privileges in the future etc.
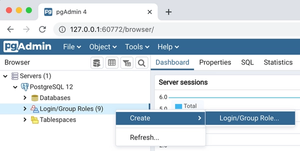
Right click on Login/Group Roles and from the popup menu select Create > Login/Group Role.
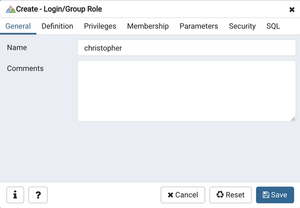
In the popup window that opens make sure you're in the General tab and pick a desired username. I'll use "christopher".
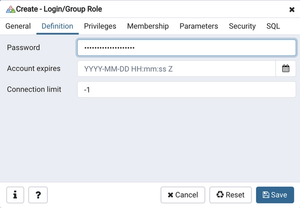
Then go to the Definition tab and set a password for this user.
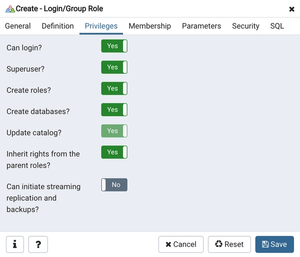
Go to the Privileges tab and set it up like this. Note that we're granting all the privileges here so in this example we're creating kind of a super user.
Click Save
Next, confirm that the user was created. If you cannot see it, right click on Login/Group Roles and click Refresh....
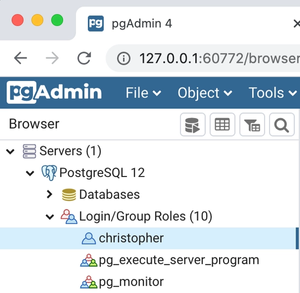
Great job! We now have our custom made user account which we can use to connect to our database in different scenarios such as remotely or from an API that we created etc.
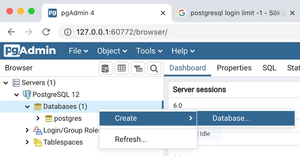
Creating a database
Right click on Databases and from the popup menu select Create > Database….
Select a name for your database, I’ll call mine mydb.
Then select the user to be the Owner of this database. In my case I set the owner to be a user that I created by following this tutorial.
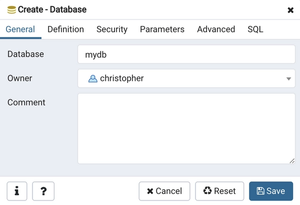
Just as a sidenote, note that if you go to the tab SQL you can see the syntax for creating this database with the settings that we chose, manually. Meaning if you’d like to execute a query by hand to manually create a database for instance.
Leave this as is and click Save
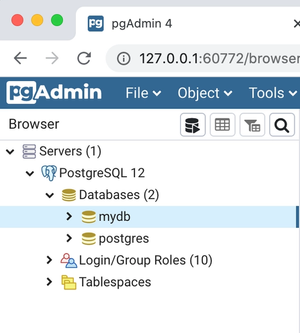
We should now be able to see our newly created database.