This is a short tutorial on how to setup a MySQL environment on your computer.
Installing MySQL Server
We'll start off by downloading and installing the MySQL Community Server. Since this tutorial focuses mainly on MacOS for now, that's what I will explain here. If you're using another OS such as Windows - head back later and I might've updated this tutorial.
So let's get started.
Go to this page and download the DMG archive (if the download doesn't start immediately - scroll down to the bottom of the page and click "No thanks, just start my download").
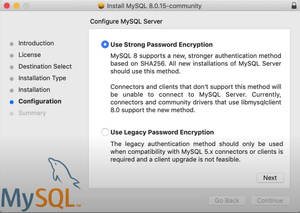
Once the download has finished, click the DMG archive to start the installation. Follow through the installation steps by clicking "Next" untill you find yourself at the "Configuration" step. This is where we set the password for the root (admin) user.
If it's not already selected, select the top alternative as shown in the image below, then click Next.
Next it's time to set the password. It's important that you use a complex password here, so fill in a complex password (that you either memorize or write down so you don't forget it) and click Finish.
You might be prompted to insert your administrator password (not the SQL password) before you can continue.
Follow the installation untill it's completed and close the installer.
Good job! You've just installed the MySQL Community Server. Next we'll need a graphical tool to manage our databases.
Installing MySQL Workbench
So in order to be able to manage our databases with simplicity, we'll need a graphical tool for that. So here's what you need to do.
Head over to this page and download the DMG archive.
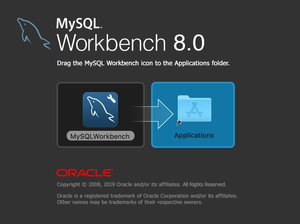
Once downloaded, click the file. Then drag the MySQLWorkbench icon to your Applications folder in the window that pops up.
Next open MySQLWorkbench, either from your Applications folder or by pressing CMD + SHIFT and typing "MySQLWorkbench" then pressing ENTER.
Now that you have opened MySQL Workbench, you should see something similar to the image below.
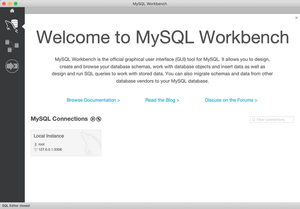
How ever, you might be lacking the Local Instance part below MySQL Connections. But don't worry! It doesn't matter. We'll create a new connection from scratch.
So, if you weren't lacking the Local Instance part, right click on it and click Delete Connection.... Then delete it.
Then click on the (+) next to the title MySQL Connections
This will popup a window as shown in the image below.
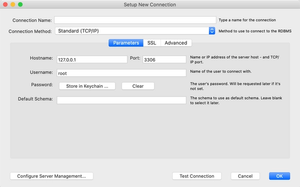
Here we'll want to leave everything just as shown in the image, but change the Connection Name to Local Instance.
Then click on Store in Keychain... and input the root password that we setup earlier for our MySQL Community Server. That complex password. Remember?
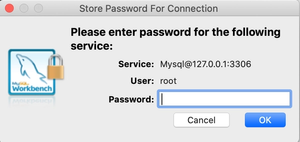
Once you've filled in the password, click OK
Next click on Test Connection
You should see a window popup saying that you Successfully made the MySQL Connection. Press OK
Press OK to save our new Local Instance.
Now you should be able to see a Local Instance below MySQL Connections. Click it to open a new instance.
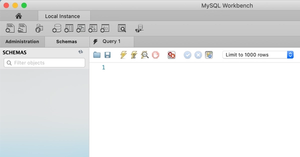
You should now be able to see this view: