Here we will learn how to build a simple React Native app that fetch movies from a REST API.
Environment Setup
Installing Expo
Make sure you have Node 12 LTS or later installed.
Begin by installing the expo-cli by running:
sh
npm install -g expo-cliInitializing project
With expo-cli installed we can now initialize a new project and then select a blank app (not using TypeScript in this tutorial):
sh
expo init MovieApp --npmNext go in to the newly created folder with cd MovieApp and then start the development server by running npm start
Your browser should now open up the Expo Developer Tools.
Running the App
On Device
Install the Expo client app on your iOS or Android phone and connect to the same wireless network as your computer. On Android, use the Expo app to scan the QR code from your terminal to open your project. On iOS, use the built-in QR code scanner of the Camera app. (source react native dev)
On Simulator (Optional)
In order to run the App on a simulator on your computer, you'll have to setup a few things. Instructions on how to setup a Android simulator and a IOS simulator can be found here under "React Native CLI Quickstart".
Project Setup
Project Structure
Create 3 new folders in the project root components, tabs, screens.
Installing dependencies
Navigation
Install the following dependencies which will help us with navigation in our app.
sh
npm install @react-navigation/native @react-navigation/bottom-tabs @react-navigation/stackRun this command in order to install dependencies neccessary for react navigation to function properly in expo:
sh
expo install react-native-gesture-handler react-native-reanimated react-native-screens react-native-safe-area-context @react-native-community/masked-viewEnvironment Variables
Install dotenv for react native so that we can store sensitive information in environment specific environment variables by running the following:
sh
npm i react-native-dotenvReplace everything in your babel.config.js file with this:
./babel.config.js
module.exports = function (api) {
  api.cache(true);
  return {
    presets: ["babel-preset-expo"],
    plugins: [
      [
        "module:react-native-dotenv",
        {
          moduleName: "@env",
          path: ".env",
          blacklist: null,
          whitelist: null,
          safe: false,
          allowUndefined: true,
        },
      ],
    ],
  };
};
UI Toolkit
Install React Native Elements which gives us cool UI components that we'll use. Install it by running:
sh
npm install react-native-elementsCarousel
A nice carousel/slider which we can use to slide between movies. Install it by running:
sh
npm install react-native-snap-carouselSetting up REST API
In our app we want to fetch movie data from an API. For this tutorial we're not going to build a movie API, instead we'll use mockapi.io to quickly create a fake endpoint where we can request some made up movies data from.
Go to mockapi.io
Sign up (It's free)
Once logged in, follow this link in order to clone a pre-defined mock database project that I've setup for you.
Once the project has been cloned into your mockapi account, copy this API endpoint defined on the page and save it as we will make use of it in the following section. It should look something like https://{YOUR-ID-HERE}.mockapi.io/api/v1/
Adding environment variables
In the project root create a file and name it .env.
Also, before doing anything else, make sure you add this file to your .gitignore file, as we're going to store secret information here which we don't want to store in Github.
In it paste your API endpoint like so:
API_BASE_URL=https://{YOUR-ID-HERE}.mockapi.io/api/v1/After you've added this, we will want to clear the expo cache. So stop the expo project running in your terminal CTRL + C and then run it with cache cleared by running expo r -c. This will save us some headache.
Creating our first screens
In our screens folder that we created previously, let's create two files home.js and search.js. These are going to be the pages that we load into the view when navigating to these screens with our tabs (which we have not created yet).
Add the following code to them individually:
./screens/home.js
import React from "react";
import { StyleSheet, Text, View } from "react-native";

export default function HomeScreen() {
  return (
    <View style={styles.container}>
      <Text>This is the home screen</Text>
    </View>
  );
}

const styles = StyleSheet.create({
  container: {
    flex: 1,
    backgroundColor: "#fff",
    alignItems: "center",
    justifyContent: "center",
  },
});
./screens/search.js
import React from "react";
import { StyleSheet, Text, View } from "react-native";

export default function SearchScreen() {
  return (
    <View style={styles.container}>
      <Text>This is the search screen</Text>
    </View>
  );
}

const styles = StyleSheet.create({
  container: {
    flex: 1,
    backgroundColor: "#fff",
    alignItems: "center",
    justifyContent: "center",
  },
});
Setting up tab navigation
Now let's modify our App.js file. Remove everything that's currently in it an replace it with the following code:
./App.js
import * as React from "react";
import { NavigationContainer } from "@react-navigation/native";
import { createBottomTabNavigator } from "@react-navigation/bottom-tabs";
import HomeScreen from "./screens/home";
import SearchScreen from "./screens/search";
import { Ionicons } from "@expo/vector-icons";
const Tab = createBottomTabNavigator();
export default function App() {
return (
<NavigationContainer>
<Tab.Navigator
screenOptions={({ route }) => ({
tabBarIcon: ({ focused, color, size }) => {
let iconName;
if (route.name === "Home") {
iconName = focused ? "ios-home" : "ios-home-outline";
} else if (route.name === "Search") {
iconName = focused ? "ios-search" : "ios-search-outline";
}
return <Ionicons name={iconName} size={size} color={color} />;
},
})}
tabBarOptions={{
activeTintColor: "tomato",
inactiveTintColor: "gray",
labelPosition: "below-icon",
}}
>
<Tab.Screen name="Home" component={HomeScreen} />
<Tab.Screen name="Search" component={SearchScreen} />
</Tab.Navigator>
</NavigationContainer>
);
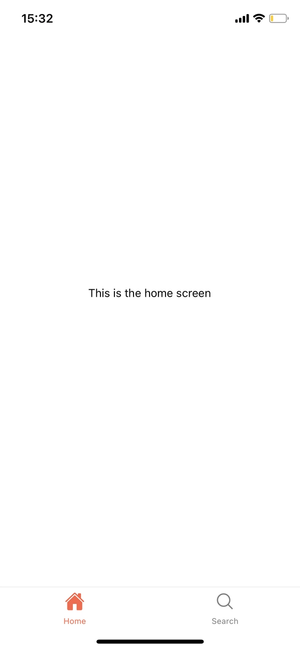
}Save the changes. Expo should refresh automatically and when it has, you should see the content of the home screen that we defined in ./screens/home.js and the home icon being the active tab selection.
Try navigating to the search screen by tapping the Search tab. The search screen should now show and the active tab selection should have changed to the search icon.
Setting up Stack navigation
Now we want to add Stack navigation to our app which will render stack views when we require them.
In our tabs folder we want to create two new files home.js and search.js. Yes this is similar to what we have in the screens folder. Then add the following to these files:
./tabs/home.js
import React from "react";
import { NavigationContainer } from "@react-navigation/native";
import { createStackNavigator } from "@react-navigation/stack";
import HomeScreen from "../screens/home";

const Stack = createStackNavigator();

function HomeTab() {
  return (
    <NavigationContainer independent={true}>
      <Stack.Navigator>
        <Stack.Screen
          name="Home"
          options={{ headerShown: false }}
          component={HomeScreen}
        />
      </Stack.Navigator>
    </NavigationContainer>
  );
}

export default HomeTab;
./tabs/search.js
import React from "react";
import { NavigationContainer } from "@react-navigation/native";
import { createStackNavigator } from "@react-navigation/stack";
import SearchScreen from "../screens/search";

const Stack = createStackNavigator();

function SearchTab() {
  return (
    <NavigationContainer independent={true}>
      <Stack.Navigator>
        <Stack.Screen
          name="Search"
          options={{ headerShown: false }}
          component={SearchScreen}
        />
      </Stack.Navigator>
    </NavigationContainer>
  );
}
export default SearchTab;
We're now going to modify our App.js file to render these tabs files containing the stack navigation, instead of rendering the screens like we currently do. Instead we're rendering the screens from the new tabs files. This means that everything will look the same, but will allow us to use stack navigation (which we will learn more about later on). So modify your App.js so it looks like this:
./App.js
import * as React from "react";
import { NavigationContainer } from "@react-navigation/native";
import { createBottomTabNavigator } from "@react-navigation/bottom-tabs";
import HomeTab from "./tabs/home";
import SearchTab from "./tabs/search";
import { Ionicons } from "@expo/vector-icons";

const Tab = createBottomTabNavigator();

export default function App() {
  return (
    <NavigationContainer>
      <Tab.Navigator
        screenOptions={({ route }) => ({
          tabBarIcon: ({ focused, color, size }) => {
            let iconName;

            if (route.name === "Home") {
              iconName = focused ? "ios-home" : "ios-home-outline";
            } else if (route.name === "Search") {
              iconName = focused ? "ios-search" : "ios-search-outline";
            }

            return <Ionicons name={iconName} size={size} color={color} />;
          },
        })}
        tabBarOptions={{
          activeTintColor: "tomato",
          inactiveTintColor: "gray",
          labelPosition: "below-icon",
        }}
      >
        <Tab.Screen name="Home" component={HomeTab} />
        <Tab.Screen name="Search" component={SearchTab} />
      </Tab.Navigator>
    </NavigationContainer>
  );
}
As stated, when you save the changes, you won't see any changes but just know that we have support for stack navigation now.
Adding Movie Sections to the Home screen
Let's create a new file in our components folder called movieSection.js and paste the following code into that file:
./components/movieSection.js
import React from "react";
import {
  View,
  Text,
  StyleSheet,
  Image,
  FlatList,
  TouchableOpacity,
} from "react-native";

function MovieSection({ title, data, onPress }) {
  const keyExtractor = (item, index) => item.id;

  const renderItem = ({ item }) => (
    <TouchableOpacity
      onPress={() => onPress(item)}
      style={styles.cardOuterContainer}
    >
      <Image
        style={styles.cardImage}
        source={{
          uri: item.poster,
        }}
      />
      <View style={styles.cardInnerContainer}>
        <Text style={styles.cardTitle}>{item.title}</Text>
        <Text style={styles.cardDescription}>{item.plot}</Text>
      </View>
    </TouchableOpacity>
  );

  return (
    <View style={styles.container}>
      <Text style={styles.title}>{title}</Text>
      <View>
        <FlatList
          contentContainerStyle={{ paddingBottom: 70 }}
          keyExtractor={keyExtractor}
          data={data}
          horizontal
          renderItem={renderItem}
        />
      </View>
    </View>
  );
}

export default MovieSection;

const styles = StyleSheet.create({
  container: {
    width: "100%",
    backgroundColor: "white",
    padding: 10,
  },
  title: {
    fontFamily: "AppleSDGothicNeo-SemiBold",
    fontSize: 24,
    fontWeight: "bold",
    marginBottom: 10,
  },
  cardOuterContainer: {
    position: "relative",
    width: 140,
    height: 200,
    backgroundColor: "gray",
    marginRight: 10,
  },
  cardImage: { width: "100%", height: "100%", position: "absolute" },
  cardInnerContainer: {
    padding: 10,
  },
  cardTitle: {
    fontFamily: "AppleSDGothicNeo-SemiBold",
    fontSize: 18,
    color: "white",
  },
  cardDescription: {
    color: "white",
  },
});
Now we want to render this movieSection component in our home screen, so open ./screens/home.js and paste the following code:
./screens/home.js
import React, { useEffect } from "react";
import { API_BASE_URL } from "@env";
import {
SafeAreaView,
Text,
View,
StyleSheet,
ActivityIndicator,
} from "react-native";
import MovieSection from "../components/movieSection";
import { ScrollView } from "react-native-gesture-handler";
function HomeScreen({ navigation }) {
const [loading, setLoading] = React.useState(false);
const [error, setError] = React.useState(null);
const [data, setData] = React.useState([]);
const handlePress = ({ title, id }) => {};
useEffect(() => {
setLoading(true);
fetch(`${API_BASE_URL}/movies?p=1&l=6`)
.then((response) => response.json())
.then((data = []) => {
if (!data.length) {
setError("No movies available");
return setLoading(false);
}
setLoading(false);
setData(data);
if (error) setError(null);
})
.catch((e) => {
setLoading(false);
setError("Fetching movies failed");
});
}, []);
if (loading)
return (
<View style={styles.container}>
<ActivityIndicator size="large" color="tomato" />
</View>
);
if (error) return <Text>ERROR: {error}</Text>;
return (
<SafeAreaView>
<ScrollView>
<MovieSection
onPress={handlePress}
data={data}
title="Latest movies"
></MovieSection>
<MovieSection
onPress={handlePress}
data={data}
title="Top rated movies"
></MovieSection>
</ScrollView>
</SafeAreaView>
);
}
export default HomeScreen;
const styles = StyleSheet.create({
container: {
flex: 1,
justifyContent: "center",
alignItems: "center",
},
text: {
fontSize: 24,
padding: 10,
textAlign: "center",
},
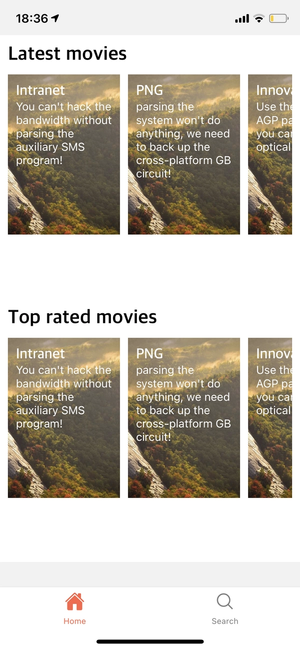
});Your app should now look something like this:
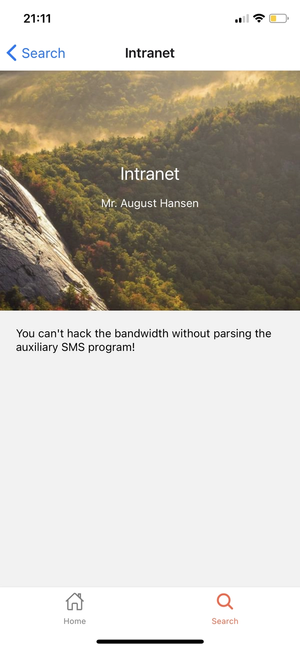
Adding Movie stack screen
Currently when we tap on a movie on our home screen, nothing happens. That's because we're only calling a handlePress function which does nothing yet. We actually want this function to navigate us to a Movie screen based on the movie we tapped on and from which we can also navigate back with a back button. Let's create that Movie screen first!
So, in our screens folder create a new file movie.js.
Paste the following code:
./screens/movie.js
import React, { useState, useEffect } from "react";
import { API_BASE_URL } from "@env";
import { ActivityIndicator, View, Text } from "react-native";
import { Tile } from "react-native-elements";

function MovieScreen({ route }) {
  const [loading, setLoading] = useState(true);
  const [error, setError] = useState(null);
  const [data, setData] = useState({});
  const { id } = route.params;

  useEffect(() => {
    setLoading(true);
    fetch(`${API_BASE_URL}/movies/${id}`)
      .then((response) => response.json())
      .then((data) => {
        if (typeof data !== "object") {
          setError("No movie available");
          return setLoading(false);
        }

        setLoading(false);
        setData(data);

        if (error) setError(null);
      })
      .catch((e) => {
        setLoading(false);
        setError("Fetching movies failed");
      });
  }, []);

  if (loading)
    return (
      <View style={{ flex: 1, justifyContent: "center", alignItems: "center" }}>
        <ActivityIndicator size="large" color="tomato" />
      </View>
    );
  if (error) return <Text>ERROR: {error}</Text>;

  const { title, writer, poster, plot } = data;
  return (
    <View>
      <Tile
        imageSrc={{
          uri: poster,
        }}
        title={title}
        featured
        caption={writer}
      />
      <View
        style={{
          flexDirection: "row",
          padding: 20,
        }}
      >
        <View style={{ flex: 1 }}>
          <Text>{plot}</Text>
        </View>
      </View>
    </View>
  );
}

export default MovieScreen;
In ./tabs/home.js we now want to import this Movie screen and add it to the Home tab's stack. So replace everything in ./tabs/home.js with this:
./tabs/home.js
import React from "react";
import { NavigationContainer } from "@react-navigation/native";
import { createStackNavigator } from "@react-navigation/stack";
import HomeScreen from "../screens/home";
import MovieScreen from "../screens/movie";

const Stack = createStackNavigator();

function HomeTab() {
  return (
    <NavigationContainer independent={true}>
      <Stack.Navigator>
        <Stack.Screen
          name="Home"
          options={{ headerShown: false }}
          component={HomeScreen}
        />
        <Stack.Screen
          name="Movie"
          component={MovieScreen}
          options={({ route }) => ({ title: route.params.title })}
        />
      </Stack.Navigator>
    </NavigationContainer>
  );
}

export default HomeTab;
Now in our ./screens/home.js modify the handlePress function:
./screens/home.js
1import React, { useEffect } from "react";
2import { API_BASE_URL } from "@env";
3import {
4 SafeAreaView,
5 Text,
6 View,
7 StyleSheet,
8 ActivityIndicator,
9} from "react-native";
10import MovieSection from "../components/movieSection";
11import { ScrollView } from "react-native-gesture-handler";
12
13function HomeScreen({ navigation }) {
14 const [loading, setLoading] = React.useState(false);
15 const [error, setError] = React.useState(null);
16 const [data, setData] = React.useState([]);
17
18 const handlePress = ({ title, id }) =>
19 navigation.navigate("Movie", {
20 id,
21 title,
22 });
23
24 useEffect(() => {
25 setLoading(true);
26 fetch(`${API_BASE_URL}/movies?p=1&l=6`)
27 .then((response) => response.json())
28 .then((data = []) => {
29 if (!data.length) {
30 setError("No movies available");
31 return setLoading(false);
32 }
33
34 setLoading(false);
35 setData(data);
36
37 if (error) setError(null);
38 })
39 .catch((e) => {
40 setLoading(false);
41 setError("Fetching movies failed");
42 });
43 }, []);
44
45 if (loading)
46 return (
47 <View style={styles.container}>
48 <ActivityIndicator size="large" color="tomato" />
49 </View>
50 );
51 if (error) return <Text>ERROR: {error}</Text>;
52
53 return (
54 <SafeAreaView>
55 <ScrollView>
56 <MovieSection
57 onPress={handlePress}
58 data={data}
59 title="Latest movies"
60 ></MovieSection>
61 <MovieSection
62 onPress={handlePress}
63 data={data}
64 title="Top rated movies"
65 ></MovieSection>
66 </ScrollView>
67 </SafeAreaView>
68 );
69}
70
71export default HomeScreen;
72
73const styles = StyleSheet.create({
74 container: {
75 flex: 1,
76 justifyContent: "center",
77 alignItems: "center",
78 },
79 text: {
80 fontSize: 24,
81 padding: 10,
82 textAlign: "center",
83 },
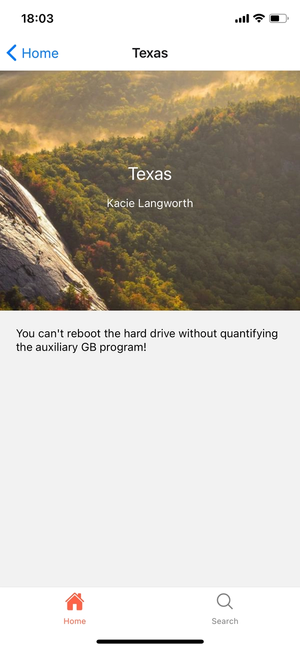
84});Now if you try pressing a movie from any of the movie sections, the app will navigate to the Movie stack screen with information about that specific movie.
Adding Movie Slider to the Home screen
Wouldn't it be nice to have a movie carousel component displaying different movies, in our home screen? Let's implement that!
So in our components folder, create a new file carousel.js. And add the following code to it:
./components/carousel.js
import React, { useState } from "react";
import { View, Dimensions } from "react-native";
import Carousel, { Pagination } from "react-native-snap-carousel";
import { Tile } from "react-native-elements";

export default function CarouselComponent({ data, onPress }) {
  const [activeSlide, setActiveSlide] = useState(0);
  const { width: viewportWidth } = Dimensions.get("window");
  let _carousel = React.createRef(null);

  const _renderItem = ({ item, index }) => {
    return (
      <View>
        <Tile
          imageSrc={{
            uri: item.poster,
          }}
          activeOpacity={1}
          title={item.title}
          featured
          caption={item.writer}
          onPress={() => onPress(item)}
        />
      </View>
    );
  };

  return (
    <View>
      <Carousel
        ref={(c) => {
          _carousel = c;
        }}
        autoplay={true}
        loop={true}
        layout={"default"}
        data={data}
        renderItem={_renderItem}
        onSnapToItem={(index) => setActiveSlide(index)}
        sliderWidth={viewportWidth}
        itemWidth={viewportWidth}
        inactiveSlideOpacity={1}
        inactiveSlideScale={1}
      />
      <Pagination
        dotsLength={data.length}
        activeDotIndex={activeSlide}
        containerStyle={{
          position: "absolute",
          width: "100%",
          bottom: 0,
        }}
        dotStyle={{
          width: 10,
          height: 10,
          borderRadius: 5,
          marginHorizontal: 8,
          backgroundColor: "rgba(255, 255, 255, 0.92)",
        }}
        inactiveDotOpacity={0.4}
        inactiveDotScale={0.6}
      />
    </View>
  );
}
Next we just need to import the Carousel component into our Home screen. So replace everything in ./screens/home.js with this:
./screens/home.js
import React, { useEffect } from "react";
import { API_BASE_URL } from "@env";
import {
SafeAreaView,
Text,
View,
StyleSheet,
ActivityIndicator,
} from "react-native";
import MovieSection from "../components/movieSection";
import { ScrollView } from "react-native-gesture-handler";
import Carousel from "../components/carousel";
function HomeScreen({ navigation }) {
const [loading, setLoading] = React.useState(false);
const [error, setError] = React.useState(null);
const [data, setData] = React.useState([]);
const handlePress = ({ title, id }) =>
navigation.navigate("Movie", {
id,
title,
});
useEffect(() => {
setLoading(true);
fetch(`${API_BASE_URL}/movies?p=1&l=6`)
.then((response) => response.json())
.then((data = []) => {
if (!data.length) {
setError("No movies available");
return setLoading(false);
}
setLoading(false);
setData(data);
if (error) setError(null);
})
.catch((e) => {
setLoading(false);
setError("Fetching movies failed");
});
}, []);
if (loading)
return (
<View style={styles.container}>
<ActivityIndicator size="large" color="tomato" />
</View>
);
if (error) return <Text>ERROR: {error}</Text>;
return (
<SafeAreaView>
<ScrollView>
<Carousel data={data} onPress={handlePress}></Carousel>
<MovieSection
onPress={handlePress}
data={data}
title="Latest movies"
></MovieSection>
<MovieSection
onPress={handlePress}
data={data}
title="Top rated movies"
></MovieSection>
</ScrollView>
</SafeAreaView>
);
}
export default HomeScreen;
const styles = StyleSheet.create({
container: {
flex: 1,
justifyContent: "center",
alignItems: "center",
},
text: {
fontSize: 24,
padding: 10,
textAlign: "center",
},
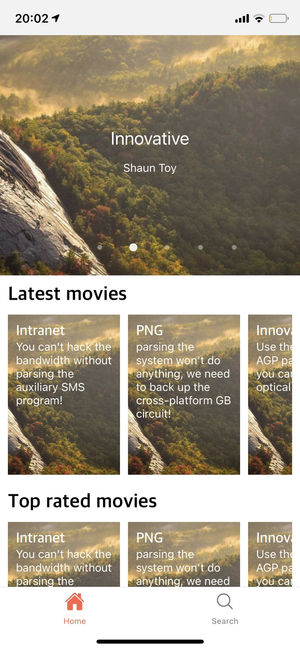
});We should now have something like this:
Adding a search screen
Right now our search tab just leads to a "mock screen" which we previously used when testing our tabs. Let's add some search functionality to it.
First let's modify ./tabs/search.js. Replace everything in that file with the following:
./tabs/search.js
import React from "react";
import { NavigationContainer } from "@react-navigation/native";
import { createStackNavigator } from "@react-navigation/stack";
import SearchScreen from "../screens/search";
import MovieScreen from "../screens/movie";

const Stack = createStackNavigator();

function SearchTab() {
  return (
    <NavigationContainer independent={true}>
      <Stack.Navigator>
        <Stack.Screen
          name="Search"
          options={{ headerShown: false }}
          component={SearchScreen}
        />
        <Stack.Screen
          name="Movie"
          component={MovieScreen}
          options={({ route }) => ({ title: route.params.title })}
        />
      </Stack.Navigator>
    </NavigationContainer>
  );
}
export default SearchTab;
Then let's replace everything in the file ./screens/search.js with this:
./screens/search.js
import React, { useState } from "react";
import { API_BASE_URL } from "@env";
import { SafeAreaView } from "react-native";
import { SearchBar } from "react-native-elements";

function SearchScreen({ navigation }) {
  const [searchValue, setSearchValue] = useState("");
  const [loading, setLoading] = React.useState(false);
  const [error, setError] = React.useState(null);
  const [data, setData] = React.useState([]);

  const handlePress = ({ title, id }) =>
    navigation.navigate("Movie", {
      id,
      title,
    });
  const clearSearch = () => {
    setLoading(false);
    setData([]);
    setSearchValue("");
  };
  const handleSearch = (value) => {
    const query = encodeURIComponent(value);

    if (value === "") return clearSearch();
    setLoading(true);
    fetch(`${API_BASE_URL}movies?title=${query}`)
      .then((response) => response.json())
      .then((data = []) => {
        if (!data.length) {
          setError("No movies available");
          return setLoading(false);
        }

        setLoading(false);
        setData(data);
        if (error) setError(null);
      })
      .catch((e) => {
        setLoading(false);
        setError("Fetching movies failed");
      });
    setSearchValue(value);
  };

  return (
    <SafeAreaView style={{ flex: 1 }}>
      <SearchBar
        lightTheme
        inputStyle={{ backgroundColor: "white" }}
        inputContainerStyle={{ backgroundColor: "white" }}
        containerStyle={{ backgroundColor: "white" }}
        placeholder="Type Here..."
        onChangeText={handleSearch}
        value={searchValue}
      />
    </SafeAreaView>
  );
}

export default SearchScreen;
Now if you save the changes and navigate to the search tab, you'll see that we have a search bar in the top. If we tap it, it opens the native keyboard so we can type a search query. How ever, it doesn't really do anything else than that. We want to display a list of movies based on our search query. So let's create a Movie List component and connect it to this search bar!
In the components folder, create a file movieList.js and copy the following code into it:
./components/movieList.js
import React from "react";
import {
  Text,
  View,
  ActivityIndicator,
  FlatList,
  TouchableOpacity,
  StyleSheet,
} from "react-native";
import { ListItem, Avatar } from "react-native-elements";

export default ({ onPress, loading, error, data, search }) => {
  const keyExtractor = (item) => item.id;

  const renderItem = ({ item }) => (
    <TouchableOpacity onPress={() => onPress(item)}>
      <ListItem bottomDivider>
        <Avatar source={{ uri: item.poster }} />
        <ListItem.Content>
          <ListItem.Title>{item.title}</ListItem.Title>
          <ListItem.Subtitle>{item.plot}</ListItem.Subtitle>
        </ListItem.Content>
      </ListItem>
    </TouchableOpacity>
  );

  if (loading)
    return (
      <View style={styles.container}>
        <ActivityIndicator size="large" color="tomato" />
      </View>
    );
  if (error) return <Text>ERROR: {error}</Text>;
  if (search && !data.length)
    return (
      <View style={styles.container}>
        <Text
          style={styles.text}
        >{`Could't find anything for "${search}"`}</Text>
      </View>
    );
  if (!data.length)
    return (
      <View style={styles.container}>
        <Text style={styles.text}>Try searching for something...</Text>
      </View>
    );
  return (
    <FlatList
      contentContainerStyle={{ paddingBottom: 70 }}
      keyExtractor={keyExtractor}
      data={data}
      renderItem={renderItem}
    />
  );
};

const styles = StyleSheet.create({
  container: {
    flex: 1,
    justifyContent: "center",
    alignItems: "center",
  },
  text: {
    fontSize: 24,
    padding: 10,
    textAlign: "center",
  },
});
Now the only thing we need to do is to import and use this newly created component in ./screens/search.js. You can replace everything in ./screens/search.js with the following:
./screens/search.js
import React, { useState } from "react";
import { API_BASE_URL } from "@env";
import { SafeAreaView } from "react-native";
import { SearchBar } from "react-native-elements";
import MovieList from "../components/movieList";

function SearchScreen({ navigation }) {
  const [searchValue, setSearchValue] = useState("");
  const [loading, setLoading] = React.useState(false);
  const [error, setError] = React.useState(null);
  const [data, setData] = React.useState([]);

  const handlePress = ({ title, id }) =>
    navigation.navigate("Movie", {
      id,
      title,
    });
  const clearSearch = () => {
    setLoading(false);
    setData([]);
    setSearchValue("");
  };
  const handleSearch = (value) => {
    const query = encodeURIComponent(value);

    if (value === "") return clearSearch();
    setLoading(true);
    fetch(`${API_BASE_URL}movies?title=${query}`)
      .then((response) => response.json())
      .then((data = []) => {
        if (!data.length) {
          setError("No movies available");
          return setLoading(false);
        }

        setLoading(false);
        setData(data);
        if (error) setError(null);
      })
      .catch((e) => {
        setLoading(false);
        setError("Fetching movies failed");
      });
    setSearchValue(value);
  };

  return (
    <SafeAreaView style={{ flex: 1 }}>
      <SearchBar
        lightTheme
        inputStyle={{ backgroundColor: "white" }}
        inputContainerStyle={{ backgroundColor: "white" }}
        containerStyle={{ backgroundColor: "white" }}
        placeholder="Type Here..."
        onChangeText={handleSearch}
        value={searchValue}
      />
      <MovieList
        onPress={handlePress}
        loading={loading}
        error={error}
        data={data}
        search={searchValue}
      ></MovieList>
    </SafeAreaView>
  );
}

export default SearchScreen;
Now we can search for movies and get results:
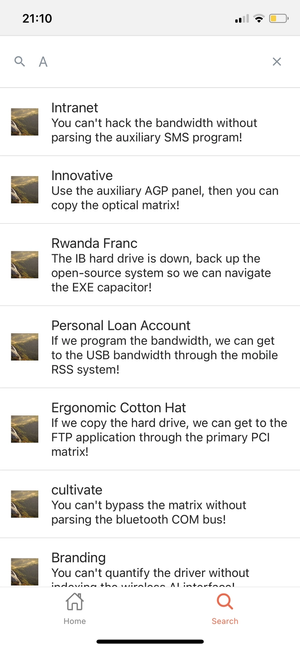
We can even press the movie we're interested in and go into that movies stack view.
Final words
Congrats! Now you know how to create a movie app with React Native!
You can find the final source for this tutorial here.